There are five tabs for configuring alarm properties and behaviors: Alarm Configuration, Event Modification, Notification, Link to Displays, and PARCtask Workflow.
Alarm Configuration Tab
The Alarm Configuration tab has five sections: Disable Alarm for a Period of Time, Uptime Options, Process Filter Tag Override, Deadband Settings, and Alarm Categorization.
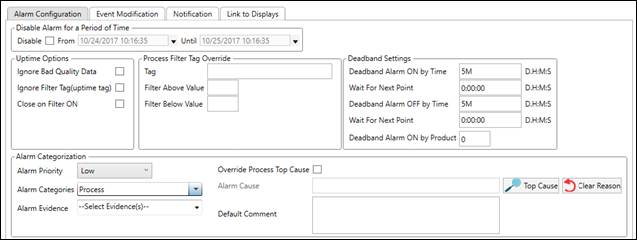
Disable Alarm for a Period of Time
Alarms can be temporarily disabled for a period of time, for example during planned maintenance.

Disable: Check to temporarily disable the alarm.
From: The start time of the disable period.
Until: The end time of the disable period.
Uptime Options
The uptime options control how the alarm handles bad quality data and the process filter.
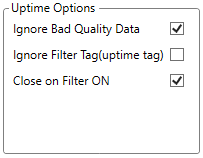
Ignore Bad Data Quality: Bad quality points will not set off the alarm.
Ignore Filter Tag (uptime tag): The alarm can enter the ON state when the filter tag is on (generally means the process is down). If this setting is not checked, the alarm will not turn on when the process is down even if the alarm condition is true.
Close Filter On: If a tag is in alarm, the alarm will be ended when the filter tag turns on (generally meaning the process is down) meaning that an active alarm will be turned off if the process the tag belongs to goes down. If the checkbox is not checked then a tag that is in alarm will continue to be in alarm if the process goes down.
Process Filter Tag Override
The Alarm can use a filter tag other than the process area’s filter tag.
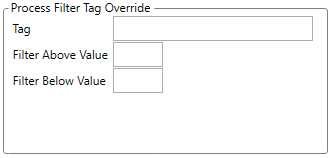
Tag: The alternate filter tag.
Filter Above Value: The alarm will use this filter when the value of the tag is above this value.
Filter Below Value: The alarm will use this filter when the value of the tag is below this value.
Deadband Settings
The deadband settings are used to filter out extraneous alarms.
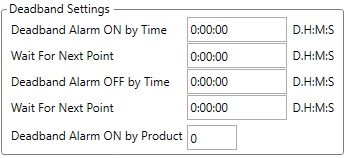
Deadband Alarm ON by Time: After alarm conditions are met, how long to wait before recording the start of an alarm event. If the alarm conditions persist for less than the deadband interval, no event is recorded. Use this to prevent lots of very short alarm events. Despite the deadband, the time when alarm conditions were met is the start time of the alarm.
Wait for Next Point: If no new datapoint is detected during the deadband, how long to wait for a new datapoint after the deadband time expires before re-evaluating whether alarm conditions persist. If the new datapoint does not fulfill the alarm conditions, no alarm is recorded. If this interval expires and no new datapoint is retrieved, the previous datapoint is used. Use this to account for the scenario where no new data comes in during the deadband interval, rendering it ineffective. This prevents misleading alarms, like when data connections are lost, rather than actual conditions-based alarms.
Deadband Alarm OFF by Time: After alarm conditions are cleared, how long to wait before recording the end of an alarm event. If the alarm conditions re-occur during the deadband interval, no end time is recorded. Use this to prevent having two events with a very narrow gap between them, when they would most likely be considered the same event. Despite the deadband, the time when alarm conditions were cleared is the end time of the alarm.
Wait for Next Point: If no new datapoint is detected during the deadband, how long to wait for a new datapoint after deadband time expires before re-evaluating whether alarm conditions persist. If the new datapoint does not continue the alarm, the alarm ends. If this interval expires and no new datapoint is retrieved, the previous datapoint is used. Again, treat this like an additional deadband interval to account for the possibility of not basing alarm event evaluation on actual data.
Deadband Alarm ON by Product: Data points must exceed the limit consecutively for a specified number new product tag values in a row for an alarm event to start.
Alarm Categorization
The Alarm Categorization cover how alarms are sorted for reporting and some default acknowledgment values.

Alarm Priority: The Priority of the Alarm can be set by choosing from Low, Medium, or High. The priority affects the color of the alarm in Alarm Lists.
Alarm Categories: The Category of the Alarm can be chosen from Electrical, Instrumental, Mechanical, Process, or Environmental. Additional categories can be configured in System Configuration. This is used for filtering in the Alarm List and Pareto displays.
Alarm Evidence: Select an evidence class for the alarm. If both the alarm itself and a selected reason have evidence configured, both evidence classes will be applied to the alarm event, unless this would result in a duplicate.
Override Process Top Cause: Check to override the top cause configured for the alarm’s process area.
Alarm Cause: When assigning reasons for this alarm, this will be the starting branch of the reason tree. Only reasons below the top cause can be selected.
Top Cause: Open the reason selector to pick a top cause.
Clear Reason: Clear the selected reason.
Default Comment: Default text entry for the comment field.
Event Modification Tab
The Event Modification tab has three sections: Split In-Progress Alarm Events, Alarm Acknowledgement Logic, and Alarm Redetection.
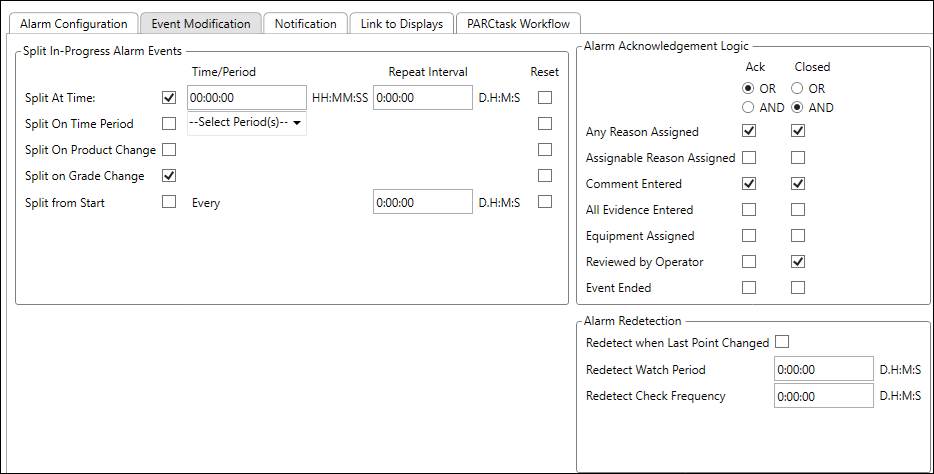
Split In-Progress Alarm Events
The duration and time of occurrence of alarm events can be logically split based on time or process conditions. When an in-progress event is split, the old event is ended and a new event is started. Users choose whether to reset any acknowledgment.
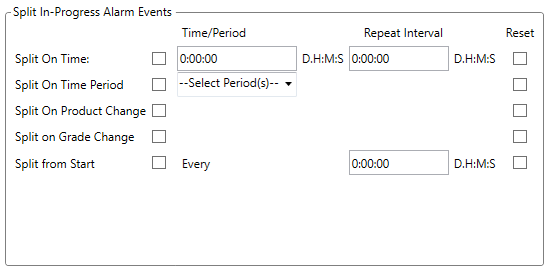
Split On Time: Split the alarm event at a specific time of the day, optionally repeating on a given interval. The Time set here means if any in progress alarm intersects this time, it will end the in-progress alarm and start a new alarm event with the split time as the start time. The Repeat Interval Indicates how often to repeat the split time. For example, if the split time is set to “07:00:00” and the “Repeat Every:” is set to “08:00:00”, any alarm that intersects 7AM, 3PM or 11PM will be split by the alarm server. This feature is very useful for separating operating shifts.
Split on Time Period: Split the alarm event by the selected time period(s). Select one or more time period type.
Split on Product Change: Split the alarm event on a new product value.
Split on Grade Change: Split the alarm event on a new grade value.
Split from Start: This setting splits an alarm event after a period of time regardless of time of day.
Reset: If checked for any split type, all acknowledgments for the alarm are reset at a split. If not checked, the acknowledgment for an alarm is carried over to the alarm event after the split. Checking this will cause the alarm after the split to be unacknowledged. It requires a reason and/or comment to be re-entered.
Alarm Acknowledgement Logic
Configure the stages of alarm acknowledgment.
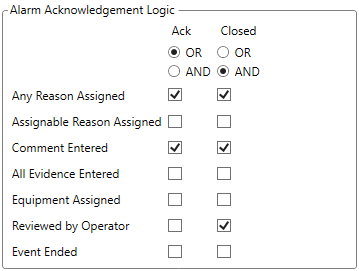
Ack: The criteria that must be met in order for an event to be acknowledged. Use the OR/AND radio buttons to choose whether the chosen requirements must all be met or if only one must be met.
Closed: The criteria that must be met in order for an event to be closed. Use the OR/AND radio buttons to choose whether the chosen requirements must all be met or if only one must be met. Any criteria that were required for acknowledgment should also be required for closing.
Any Reason Assigned: Whether any reason has been assigned to the event.
Assignable Reason Assigned: Whether an assignable reason has been assigned to the event.
Comment Entered: Whether a comment has been entered for the event.
All Evidence Entered: Whether all required evidence has been assigned to the event.
Equipment Assigned: Whether any equipment has been assigned to the event.
Reviewed by Operator: Whether the alarm event has been saved by the user.
Event Ended: Whether the alarm event has ended.
Alarm Redetection
Use the Alarm Redetection settings to re-assess alarms on tags that may have points change in history or come in late, such as manually entered data.
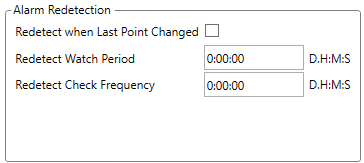
Redetect When Last Point Changed: This section is used to redetect Manual Data Entry tags or tags that might have their last value changed. If the point is determined to have changed, the alarm conditions will be reevaluated.
Redetect Watch Period: The time span of how far back to check for a new data point.
Redetect Check Frequency: How often to check for a new data point.
Notification Tab
The notification tab has three tabs of its own: Messaging, OPC DA Notification, and Global Email List.
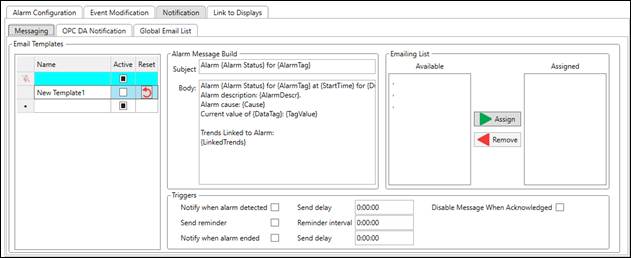
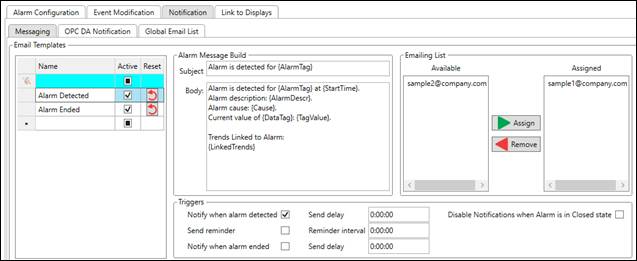
Messaging
Use the messaging tab to build emails to send when alarms are detected or ended, or as reminders.
Email Templates
The email template is the container for the email configuration settings. Alarms can use multiple templates, but templates are not shared between alarms.
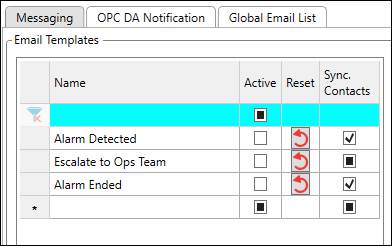
Name: Unique name for the template.
Active: Whether Alarm Server will send emails for this template.
Reset: If the template is modified from its saved state, this will reset the template to the default state.
Sync Contacts: If checked for multiple templates, keep email contact lists synchronized.
Right-Click Menu
Right-click the templates grid for context menu options.

View Audit: View history of changes to the email template.
Add: Selects the new item row.
Delete: Marks the selected template for deletion.
Copy All: Copies the grid values to the clipboard.
Export All to Excel: Saves the grid as a Microsoft Excel file.
Alarm Message Build
Use this section to build the email message.
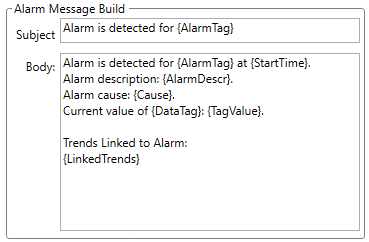
Subject: The email subject.
Body: The email body.
Parameters
In either the Subject or Body fields, parameters or “tokens” can be used to dynamically populate text. For example, the parameter {AlarmTag} will autopopulate with the full alarm UTag name. Parameters are not case sensitive.
Parameter | Description |
AlarmTag | Full alarm tag name (alarm UTag: Location.Server.TagName.Alarm.AlarmName). |
AlarmName | Alarm name as defined in configuration. |
AlarmDescr | Alarm description as defined in configuration. |
Tag | Full tag name (UTag) of base tag. |
DataTag | Full tag name (UTag) of a main data tag. |
StartTime or StartDate | Time when alarm started. |
EndTime or EndDate | Time when alarm ended. “In-progress” when alarm is still in-progress. |
Duration | Duration of alarm event. For in-progress alarms, this is the difference between now and the start time. Output format: 1day 5hr 34.5min – longer than a day. 5hr 34.5min – longer than an hour. 34.5min – less than an hour. 35sec – less than a minute. |
TagValue | Current value of main data tag. |
Cause | “Bad quality” or “Rule violation”. |
LinkedTrends | Trends linked to the alarm or “None”. |
UTagValue | Same as TagValue, the current value of the main data tag. |
UTagValue:"LOCATION.SOURCE.TAGNAME" | Will get the current value of the specified tag. Enter a fully qualified UTag name surrounded by quotes, e.g.: {UTagValue:"VAN.BLR.FIC_221_543.PV"} |
UTagDesc | Description of main data tag. |
UTagDesc:"LOCATION.SOURCE.TAGNAME" | Will get the description of the specified tag. Enter a fully qualified UTag name surrounded by quotes, e.g.: {UTagDesc:"VAN.BLR.FIC_221_543.PV"} |
AlarmStatus | Will be either “Detected”, “Reminder”, or “Ended”, depending on the email trigger. This allows for a generic email for all three cases. |
Emailing List
Configure the list of email recipients for the selected email template.
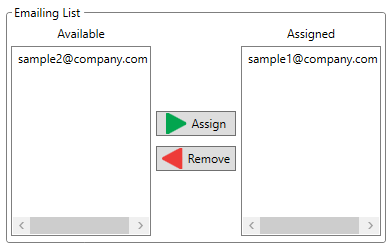
Available: List of email addresses not assigned. Multiple addresses can be selected by selecting each individually.
Assigned: List of email addresses that will receive the selected email template based on the configured triggers. Multiple addresses can be selected by selecting each individually.
Assign: Move the selected email address(es) to the assigned list.
Remove: Move the selected email address(es) to the available list.
Triggers
Configure when Alarm Server will send emails for this template. Multiple triggers can be applied to a single template.

Notify when alarm detected: Notification is sent when alarm is detected.
Send Delay: How long to wait before sending the alarm after it is detected. Use this as a deadband on short alarms, or to send multiple detected emails after varying lengths of time to the same or different recipients.
Disable Notifications when Alarm is in Closed state: Do not send notification email if an alarm event’s closing criteria have already been met. See Alarm Acknowledgement Logic.
Send Reminder: Sends another update after a certain period of time.
Reminder Interval: How often to send the reminder after the alarm is detected.
Notify when alarm ended: Sends another update after a certain period of time.
Send Delay: How long to wait before sending the alarm after leaving the alarm state. Use this as a deadband on alarms that end and then start again shortly thereafter.
Disable End Notification if Detected Not Sent: Do not send end notification email if the initial detection email was not sent.
OPC DA Notification
Use this section to configure an alarm to write to an OPC DA server when in the alarm state. This can provide feedback to the plant operator’s control system so alarms can be viewed on the control console or other action can be automatically taken.
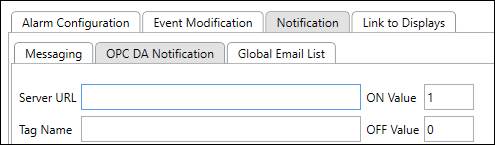
Server URL: This is the address of the OPC Server.
Tag Name: The name of the OPC tag to write to.
On Value: When the alarm is on, the value in the On Value field will be sent to the OPC Server.
Off Value: When the alarm is off, the value in the Off Value field will be sent to the OPC Server.
Global Email List
The Global Email List tab contains the list of email addresses used by all alarms.
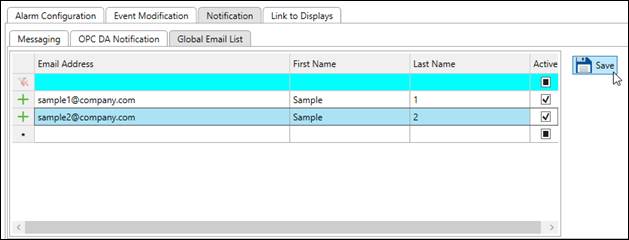
Email Address: Valid email address.
First Name: First name of email recipient.
Last Name: Last name of email recipient.
Active: Whether this address is available for use by email templates.
Save: Save changes to the global email list.
Right-Click Menu
Right-click the email address grid for more options.
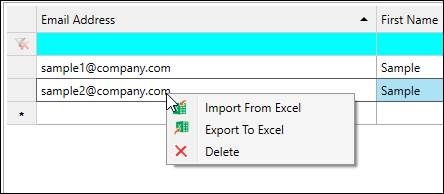
Import From Excel: Populate grid from a saved Microsoft Excel file.
Export To Excel: Save the grid values to a Microsoft Excel file.
Delete: Delete the selected row.
Link to Displays Tab
This tab allows a display to be linked in the body of email notification and makes those links accessible in the Alarm List display.

Title: Enter a display title, which will appear in emails and the alarm lists.
Display Path: The display path should be a location that is accessible to all users.
Browse: Launch a file browser. Select a file to populate the Display Path field.
Sort Order: This controls the order in which linked displays are sorted if there are multiple.
Right-Click Menu
Right-click the linked displays grid for more options.
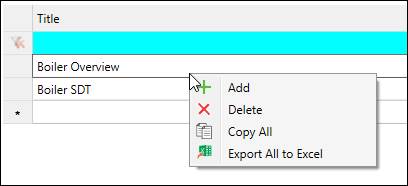
Add: Selects the new item row.
Delete: Marks the selected template for deletion.
Copy All: Copies the grid values to the clipboard.
Export All to Excel: Saves the grid as a Microsoft Excel file.
PARCtask Workflow Tab
Use this tab to configure a PARCtask workflow to execute once or repeatedly when alarms are detected, or to execute once when they end. One advantage to using PARCtask with alarms is the ability to attach files to notification emails.
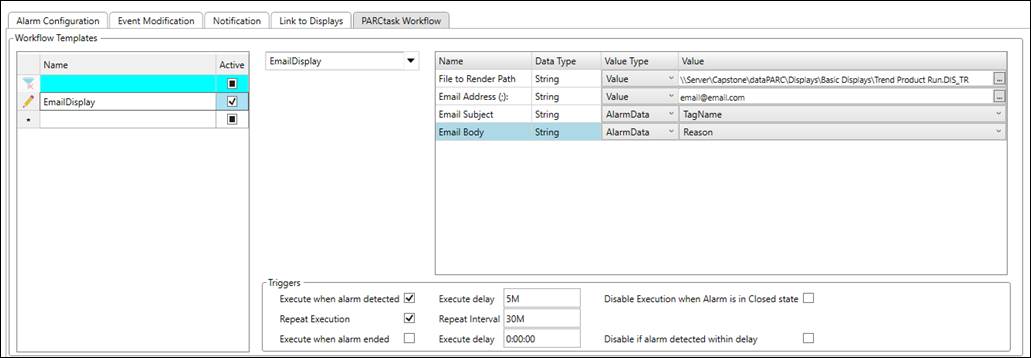
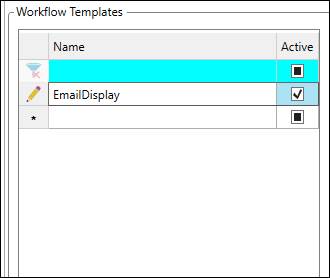
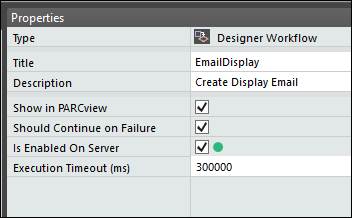
Workflow Templates
Select from existing workflow templates. To create a new template, enter a template name in the bottom (*) row. Workflow templates are not shared among alarms.
Right-Click Menu
Right-click a workflow template to view options, including the workflow execution audit window.
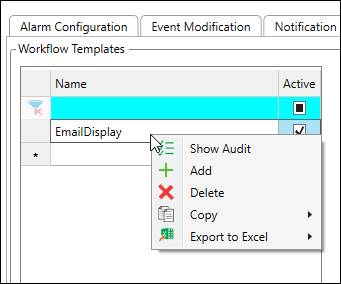
Show Audit: Opens audit view of changes to workflow template.
Add: Create new workflow template.
Select PARCtask Workflow
Open the drop-down to select from available workflows.
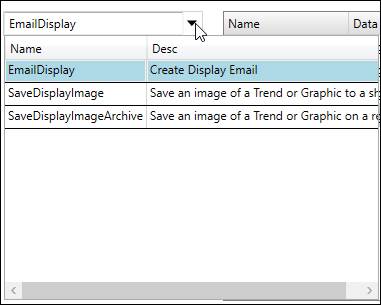
These are workflows that have been configured to be shown in PARCview in the PARCtask Workflow Designer.
Right-Click Menu
Right-click the workflow picker to open the menu.

Refresh: Refresh the workflow list.
Open in Workflow Designer: Open selected workflow in PARCtask Workflow Designer for editing.
Workflow Parameters
The workflow parameters grid shows the parameters that can be supplied with values at workflow execution. The values can be user supplied or can come from the alarm event. The parameters that appear here are marked as PARCview Overridable in PARCtask Workflow Designer.
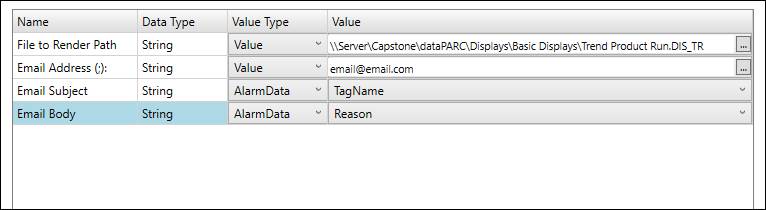
Name: Value of the PARCview Prompt property of the parameter.
Data Type: Type of value the workflow expects. The value entered must conform to this type.
Value Type: Source of value.
Default: Do not override parameter value. Makes value field not editable. Value that is used will be whatever was set in PARCtask Workflow Designer as the default value.
Value: User must manually supply value. Click the ellipsis button to launch an editor.
AlarmData: Use alarm event data to supply the value. Changes the Value field to a drop-down menu. Select from available alarm event properties.
Value: The values that will be used by the workflow for this parameter at execution. Depends on selected value type.
Workflow Triggers
The workflow triggers section controls when the workflows will execute.

Execute when alarm detected: Trigger workflow when is detected by Alarm Server.
Execute delay: How long to wait after detection before triggering workflow.
Disable Execution when Alarm is in Closed state: Do not trigger the workflow if the alarm event’s closing criteria have already been met. See Alarm Acknowledgement Logic.
Repeat Execution: Whether to re-trigger the workflow after specified period of time.
Repeat Interval: Time between repeat executions.
Execute when alarm ended: Trigger workflow when the alarm has ended.
Execute delay: How long to wait after alarm has ended before triggering workflow.
Disable if alarm detected within delay: Do not execute if a new alarm is detected within the delay interval.