In area configuration mode, the entry grid is replaced by the area configuration tabs. To enter area configuration mode, use the Area Tree Right-Click Menu or the Setting Tab of the ribbon. Once an area has been modified, the Save and Cancel buttons (lower right) enable, the Area Tree disables, and area configuration mode is locked on. Either save or discard changes to select a different area or to exit area configuration mode. (Note that the save buttons on the ribbon will save the Logbook display, not configuration settings.)
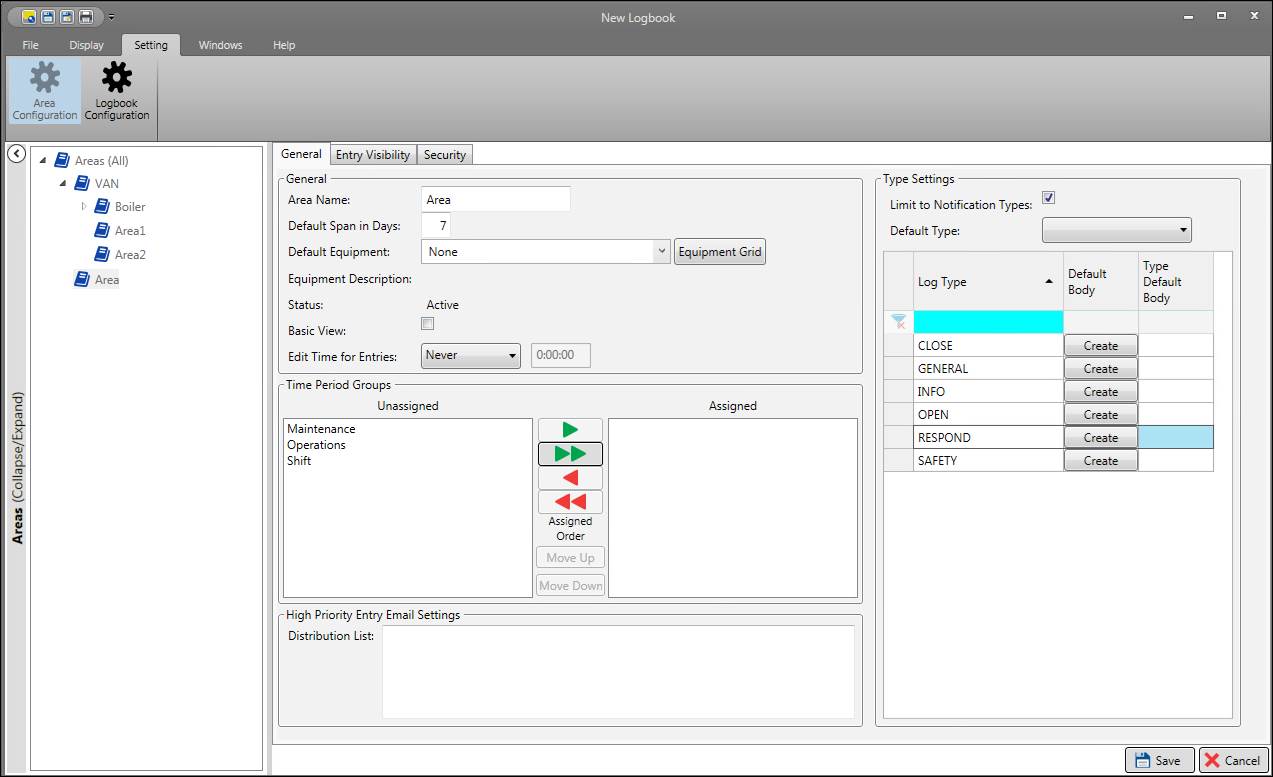
Save: Save area changes.
Cancel: Discard changes.
General
Use the General tab to configure general area settings, time period groups, email, and default type settings.
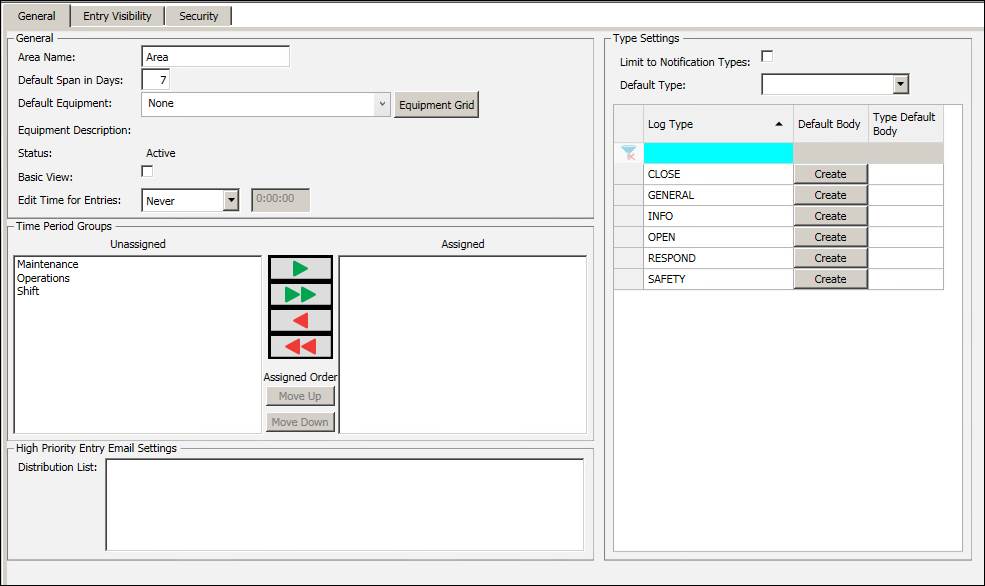
General
Area Name: Name of the Logbook area.
Default Span in Days: How many days into the past to extend the start time filter when viewing this area.
Default Equipment: Default starting point of the equipment tree. Use the tree drop-down or open the equipment grid to select the starting point.
Equipment Description: Description of default equipment.
Status: Indicates whether the area is active or deleted. Deleted areas that have subareas or contain entries can still be viewed but cannot be modified unless they are un-deleted.
Basic View: If checked, enable basic view for this area by default.
Edit Time for Entries: Configure whether users can edit log entries after they are saved.
Always: Users can always edit log entries in this area.
Never: Users can never edit log entries in this area.
Time Period: Users can only edit log entries in this area up until the end of the specified amount of time. Enter a number followed by a time key letter (S for seconds, M for minutes, H for hours, D for days).
Time Period Groups
Time periods that are grouped can be tied to a log entry. Move the group of time periods to use to the Assigned list.
High Priority Entry Email Settings
Enter a semicolon delimited list of recipient email addresses for high priority log entries.
Type Settings
Limit to Notification Types: Only allow users to create notification-type entries in this area.
Default Type: Select the default type of new log entries in this area. If none is selected, no type is selected when new entries are created.
Default Body: Click Create to enter a default body for new log entries of the selected type. The default body will populate when the entry is created, and then users can choose to modify the log entry body. If a default body has been entered, the Create button changes to an Edit button.
Type Default Body: If a default body has been configured for this type in Logbook Configuration, then users can view it here. If an area-specific default body is created, it will override the type default body.
Entry Visibility
Use the Entry Visibility tab to configure the visibility of entries among areas deciding whether an area will pull or push entries of a given type to or from its child areas.
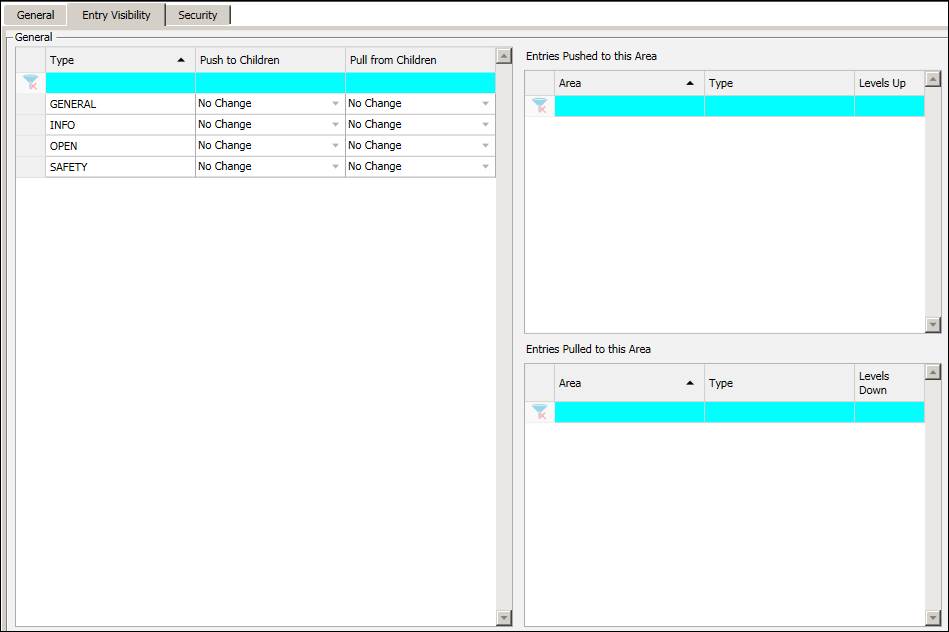
Type: Entry Type.
Push to Children: Whether to push entries from this area to child areas.
No Change: This area has no effect on entry visibility.
Block: Block entries of this type from pushing to children.
Block and Propagate: Block entries from parent areas from propagating, and instead push entries from this area to child areas.
Pull from Children: Whether to pull entries to this area from child areas.
No Change: This area has no effect on entry visibility.
Block: Block entries of this type from pulling from child areas.
Propagate: Pull entries of this type from child areas.
Entries Pushed to this Area: Lists entries pushed to this area based on all areas’ entry visibility settings.
Entries Pulled from this Area: Lists entries pulled from this area based on all areas’ entry visibility settings.
Security
Use the Security tab to configure access levels for users. First set the default access level, then assign permissions to users as needed.
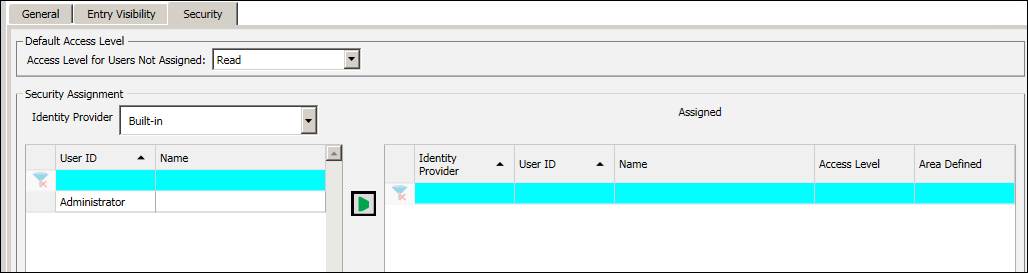
Access Level for Users Not Assigned: This is the default permission for all users without explicit permissions. In general, best practice is to make a decision about this setting first, then apply user-specific permissions as needed. Select the users in the available grid, then move them to the assigned grid and assign permissions. The default access level cannot be full access, so this must be explicitly granted to users that are not PARCsecurity administrators.
Deny: User is denied access and cannot view entries in this area.
Read: User has read access and can view entries in this area.
Write: User has write access and can view and create entries in the area.
Identity Provider Drop-Down: Select the identity provider that will populate the available user grid.
Available User ID: Login of user.
Available User Name: Name of identity, if configured.
Assigned User Identity Provider: Identity provider to which user belongs.
Assigned User ID: Login of user.
Assigned User Name: Name of identity, if configured.
Assigned User Access Level: This permission setting overrides whatever is set for the Access Level for Users Not Assigned.
Deny: User is denied access and cannot view entries in this area.
Read: User has read access and can view entries in this area.
Write: User has write access and can view and create entries in the area.
Full: User has administrative access to the area.
Area Defined: If the security permission is inherited from a parent area, this field shows the area that defines the permission.