The Tags tab contains the centerline’s tag set. Group tags into logical sections, give tags custom descriptions, enable tag limits, and more.
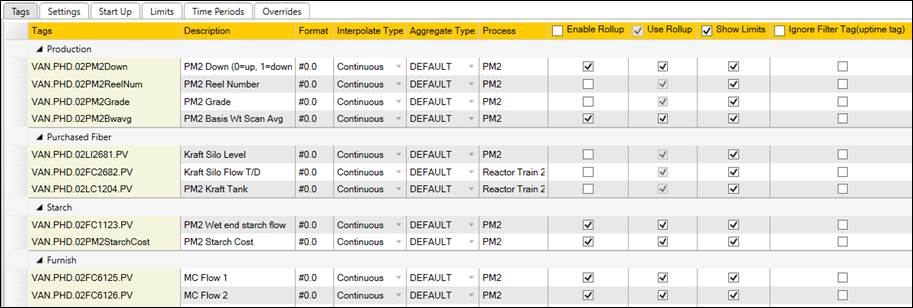
Tags: The tag name that is being added to the centerline. The tag name can either be manually entered or dragged and dropped in.
Description: When a tag is added to a centerline, its default description is automatically applied. This is the label that will be shown on the centerline display. This description can be customized. Click in the Description column and enter a new description. This is a local change and only affects this centerline display.
Format: Centerline tags use a default format mask of “0.##”. To customize the format mask, click in the Format column and enter a new mask. This is a local change and only affects this centerline display.
Interpolate Type: Interpolation mode when calculating interpolated values or aggregated values.
Aggregate Type: Whether to use Centerline’s aggregate type (DEFAULT) or always use specific aggregate type.
Process: This column indicates the tag’s process area. The process can be modified here, but only if edits are allowed. To enable modifications, click Allow Edits on the Home ribbon bar and enter the appropriate password. If PARCsecurity is enabled, this feature requires the System Config Process tags role. To assign a tag to a process area, open the Process menu and select an area from the process tree. Note that these changes are applied automatically and do not require saving.
Enable Rollup: This column indicates whether the tag has been configured to have aggregates calculated by PARCrollup Server. The process can be modified here, but only if edits are allowed. To enable modifications, click Allow Edits on the Home ribbon and enter the appropriate password. If PARCsecurity is enabled, this feature requires the System Config Process tags role. Check Rollup to turn on roll ups for a tag. To enable roll ups for all tags in the centerline, click the Rollup All button. Note that these changes are applied automatically and do not require saving.
Use Rollup: Use rollup data if available.
Show Limits: Whether to show limit values and change value colors when limit violations occur.
Ignore Filter Tag(uptime tag): If checked, do not apply downtime filtering to aggregates for this tag.
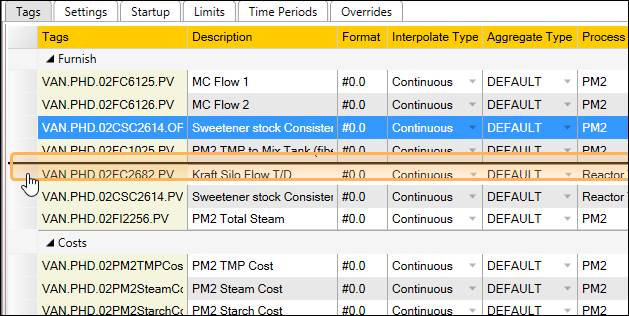
After tags have been added, their order can be rearranged. To move tags, select a row and then drag and drop onto a new position.
Tags Right-Click Menu
Use the right-click menu to create tag sections. Select multiple tags then right-click and select Create Group.
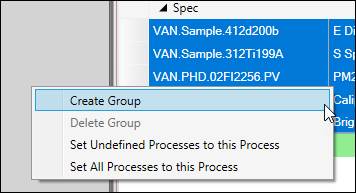
Set Undefined Processes to this Process: For any tags in the Centerline that are not assigned to a process, set them to the process of the selected tag.
Set all Process to this Process: Assign all tags in the Centerline to the process of the selected tag.
Add New Group
Enter a Group Name (required). Optionally change the Background color, Foreground color, or Font style. Click Add New Group to create the tag section.
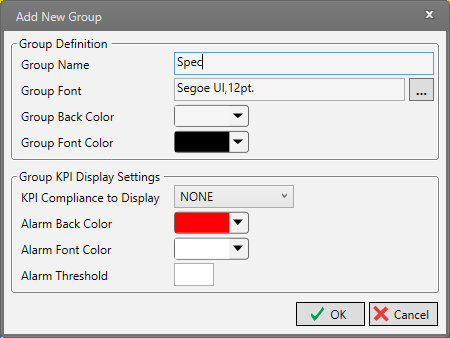
KPI Compliance to Display: Select the limit type to use for calculating percantage of time within limits.
Alarm Back Color: Background color of group header when alarm threshold is not met.
Alarm Font Color: Font text color on group header when alarm threshold is not met.
Alarm Threshold: Percentage to use in alarm coloring. Enter a value between 0-100. When total percentage of time outside of limits for all tags in the group is below the threshold, the alarm coloring takes effect.
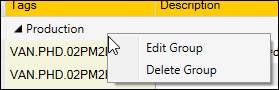
Edit or Delete Group
Right-click an existing section header to edit or delete the group.