This sheet adds and edits PARCview limits. To open a new Limit Editor sheet, click the Admin Tools icon, then select Limit Editor from the drop-down gallery.

Select a Location and Source by clicking the corresponding ellipsis buttons.

To display the current limits in the database, click Get Limits. Optionally specify filters for Tag Name and Grade. All other fields are not used at this point.
Editing Limits Manually
After displaying the limits, you may edit them manually.
Find the desired Tag Name and Grade. To edit non-grade-based limits, find a row with an empty grade.
Fill Lower, T arget, and Upper with the new limits. Use the fields under Control or Spec as appropriate. If entering another limit type, change all instances of either Control or Spec on the sheet to the other limit type’s name. You may enter any combination of limits and limit types at once. As you change the fields, they will turn yellow.
Fill Date with the effective date of the limit. If date is left empty, the limit will take effect starting at the current time.
Select all rows with edited limits and click Set Limits.
Calculating Limits
For tags with rollup data, you may also calculate limits based on the average and standard deviation of rollup runs. For grade-based limits, grade runs are used. For non-grade-based limits, days are used.
Click the Limit calculator expander to reveal the limit calculation options.
Fill the Start date and End date with the interval containing the runs on which to base the calculation. Optionally fill Max runs with the maximum number of runs to use (the calculation will prioritize runs with later start dates), and Min hours with the minimum hours of uptime for a run to be used.
Select the desired Tag Name and Grade rows. To calculate non-grade-based limits, select rows with an empty grade.
Click Fill Calcs. The fields under Calc will fill in for the selected rows.
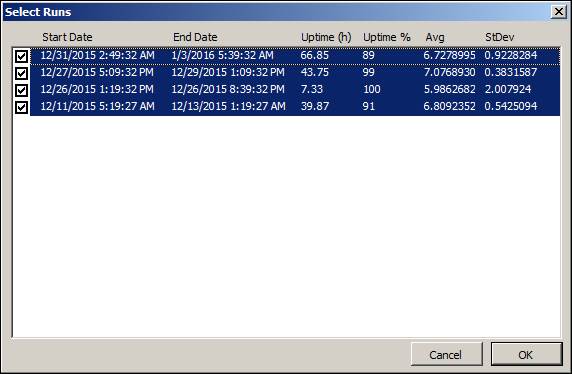
Review the Avg (average), StDev (standard deviation), Hours (total uptime hours), and Runs (number of runs). To see and change the basis runs for a row, select that row and click Detail Calc. The Select Runs form will appear. Click the checkboxes to toggle whether to use each run.

Re-select the rows with calculations, and click Auto Limits. The limits will fill according to the following formulas by default: Control Lower = Avg – 3 * StDev, Control Target = Avg, Control Upper = Avg + 3 * StDev. Use the Lower multiplier and Upper multiplier fields to change the number of sigmas. Limits are rounded to two decimal places by default. The new limits’ effective date will be midnight of the current day.
Click Set Limits to save the new limits.